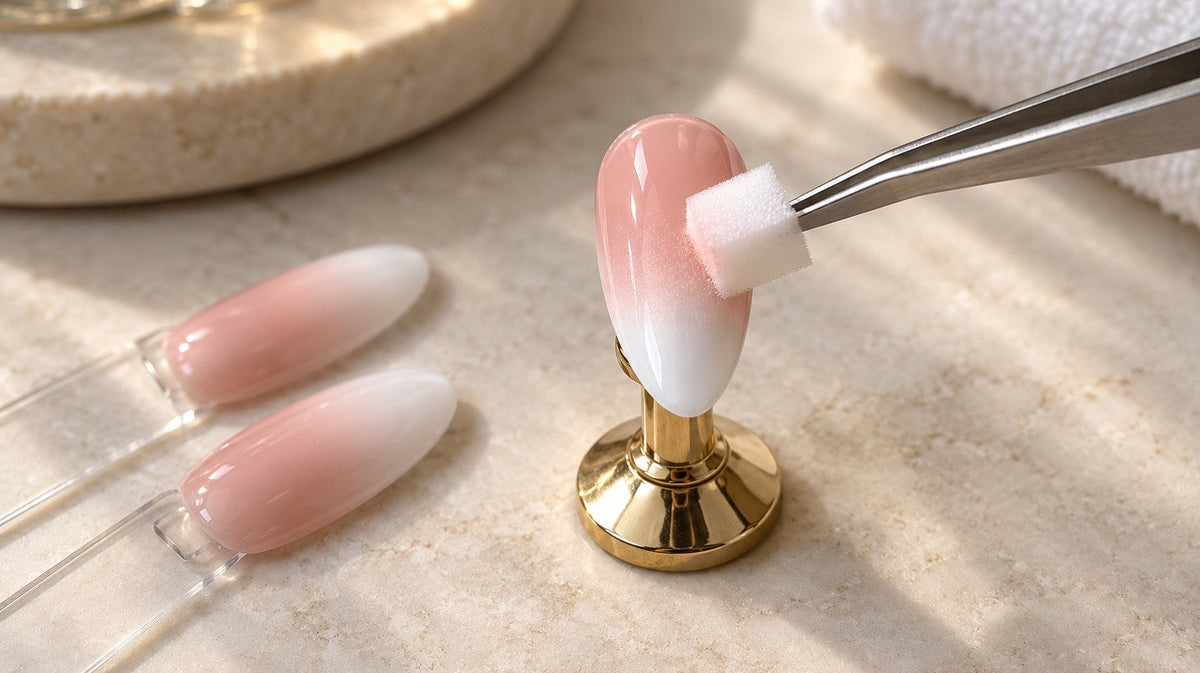
Smoother Ombré Nails: Blending Without Streaks or Harsh Lines
By the Nove Academy Team | Nove Wholesale
A smooth ombré is a gradual fade from one color into another. A clear transition, a small amount of product, and patient layers help create a softer fade.
This guide focuses on a sponge method for gel color. Follow the exact product system for prep and curing, and keep uncured gel off the skin.
The quick answer: Apply and cure the base color as its manufacturer directs. Place two gel colors beside each other on a clean ombré sponge, overlap them slightly, and tap lightly over the transition. Use thin layers, cure each layer for the full time specified for your system, and repeat only until the fade looks balanced. Finish with a compatible top coat.
Plan the fade before you open the bottles
Decide where the color change should sit and which shade should be strongest at each end. A nude-to-white fade, for example, needs a different starting point from a two-color sunset. Try your color pair on a practice tip first so you can see how the actual gels blend and how much coverage each one gives.
Colors with very different opacity can behave differently on a sponge. If the lighter shade disappears, add it in a thin layer instead of flooding the sponge. If the transition looks muddy, try a more compatible pair or let the first layer set according to your system before adding another.
Pro Tip from Nove Academy: Keep the gradient simple at first: two colors, one direction, and one practice nail. Add a third shade only when it improves the transition.
For a pink-to-white practice blend, compare the semi-sheer Luxio Blush with Akzentz - Luxio - Polar - 15ml, an opaque white. A practice tip shows you how those different coverage levels meet before you repeat the design on a client.
Set up for a clean, even application
Complete your regular manicure prep and apply the base coat required by the gel system. Keep product away from skin and cure exactly as the manufacturer directs.
Apply the planned base color in a thin, even layer. Cure it using the lamp and time specified for that exact product system.
Cut a clean sponge surface to suit the nail. Put a small amount of each shade beside the other on a palette or sponge, leaving a narrow overlap where the colors meet.
Dab lightly onto a practice tip first. Check whether the sponge leaves an even print and whether the transition lands where you want it. Add less product if the result looks heavy.
A sponge can absorb some of the product and may leave texture. A fresh, clean face helps you avoid transferring dried color or lint into the design. If a sponge is shedding, damaged, or difficult to control, switch to another clean piece or a suitable art brush.
A dedicated ombré sponge kit gives you a consistent tool for controlled practice. Choose a clean sponge surface as you build each blend, and follow the package directions for care.
A Coconoir Beauty - Tip Holder - Pink Gold - 5pc gives your practice tip a place while you test the colors and the blend. Work out the color balance there before repeating the design on the client.
Build a soft transition with light taps
Place the sponge over the nail without stretching it. Align the color boundary with the transition point you planned.
Tap gently in place, then lift straight up. Avoid dragging the sponge across the nail; dragging can smear the colors or shift where the fade sits.
Check the result before adding more. If you need another pass, reposition the sponge carefully and use a small amount of product. Build opacity over multiple thin layers rather than trying to cover the nail in one heavy application.
Keep gel off the sidewalls and surrounding skin. Clean any accidental contact before curing, following the product system’s safety directions.
Cure for the exact time and lamp specified by the gel manufacturer. Repeat the light blend-and-cure process only as needed to improve the transition.
Take a moment to inspect the fade from the top and side. A gradient may look different under different lighting. Check for a hard stripe, bare patches, too much texture, or one shade covering nearly all the other before you decide whether another layer will help.
Akzéntz Luxio Blush is a semi-sheer neutral pink with a soft wash of color. Try it on one side of a subtle fade, then test the second shade beside it on a practice tip.
When a brush gives you more control
A sponge is handy for repeated tapping across the nail. A brush can help when you want to place the transition precisely or work in a smaller area. Apply the two colors where they should meet, then use gentle, short strokes at the boundary to soften the line. Clean the brush according to the product maker’s directions and keep uncured gel off skin.
Do not use the brush to push a large pool of gel from one side to the other. That can blur the whole design instead of softening the edge. Thin layers and a small working area make the blend easier to control.
This general-purpose oval gel brush gives you a compact tool for gentle blending when you want more placement control than a sponge. Its cap helps protect the brush between uses.
Fix the cause of a patchy or harsh fade
A hard line remains: reduce the amount of gel, use lighter taps, or add a carefully placed thin layer at the boundary.
The colors look muddy: test a different pair, use less product, and avoid overworking the same wet area.
The sponge leaves visible texture: use a clean, suitable piece and smaller amounts. Check whether the cured top layer can be refined safely within the manufacturer’s system instructions before finishing.
The fade is lopsided: reset the sponge position and check its alignment before each pass. Rotating the finger can help you view the boundary squarely.
The nail looks bulky: stop adding layers. Sponge work can add product thickness, so plan thin coats and keep the overall structure within the system instructions.
Pro Tip from Nove Academy: If you need to correct the fade, do it before the final top coat. Once the design is cured and finished, filing or buffing can change the color pattern.
Finish without hiding the gradient
When the fade is even, apply the compatible top coat in a smooth, controlled layer and cure as directed. Follow the system instructions for removing any sticky layer. Avoid filing through the color or adding extra product just to conceal a blend that needs correction.
Take a final look under bright, neutral light. Check the sidewalls, free edge, and overall transition. Aim for an intentional, balanced fade that looks smooth at the distance your client will see it.
For a Luxio color design, Akzentz - Luxio - Gloss - 15ml provides a matching glossy finish. Complete the fade first, then apply and cure the top coat according to the exact system directions.
A Few Common Questions
Why does my sponge ombré look patchy?
The sponge may have too much product, an uneven face, or dried color on it. Use a clean surface and light taps, then build coverage in thin layers. Check the exact gel system’s curing directions between layers.
Should I put both colors directly on the sponge?
You can test adjacent stripes with a slight overlap, then tap onto a practice tip to check the transfer. Some product systems or sponge types behave differently, so use a small amount and adjust based on the actual result.
Can I use a brush instead of a sponge?
Yes, a suitable gel art brush can give you more precise placement. Blend only at the color boundary with short, light strokes and follow the product maker’s instructions for cleaning and curing.
How many coats should I use?
There is no one number for every formula and color. Use thin layers and stop when the fade looks balanced. Cure each layer for the exact time and lamp specified for the products you are using.
Can I use any gel colors together?
Do not assume all products are compatible because they look similar. Follow the manufacturers’ system guidance, and test the exact pair on a practice tip before offering the design.
How do I keep gel off the skin?
Use a controlled amount, align the sponge carefully, and leave clearance at the sidewalls and cuticle. If uncured gel touches skin, clean it before curing according to the product’s safety directions.
Let the blend build gradually
Choose colors that work together, start with a small amount, and tap in thin layers. A practice tip helps you find the right pressure and transition before you repeat the design on a client.
Explore our Nove Academy Guides for more practical product and technique advice, or ask the Nove team for help choosing products for your service.
Professional education from Nove Academy. Follow your training and the current instructions for your exact products and equipment. Product availability can change.


 ellpellz
View all reviews on Google
 Rowan Jeancart
 Kathy Heynemans
 ML M
 Morgen Schick
 Sydney Kolbeck
 sidra Akram
 Dinelle Lajeunesse
 Amanda Dietrich
 Trudy Sands
 lou gaudet
 Dean Prediger (Preds)
 Jessica Hueser
 Ashlyn Evans
 Shekinah Petten
 Shayla Millar
 blaze
 Kela Groeschel
 Shantell Redlick
 Hayley-Rae Gardipy
 Kim Calvert
 Rachel Mcgonigal
 Diane Newton
 Alissa Gaudet